Installing Capture Client on Mac
Do this only one time on every macOS endpoint. If you already approved it, there is no need to repeat it when the SentinelOne App is updated. If you do not complete this prerequisite step, your mac will not be fully protected.
If you get below alert (During and After Installation), click on "Allow".
To approve Network Extension:
Incase you did not click allow, Go to System Preferences -> Security & Privacy -> General, and look for the same prompt. Unlock & allow the same.
The macOS (10.15 Catalina and later releases) makes sure that applications are installed in a secure way. It limits installation only to applications that are approved by Apple and the user. This change does not let applications access specified paths (such as Documents, Downloads, and Desktop) without user consent.
If the SentinelOne icon shows "Needs user attention" or these messages "Authorize Full-Disk-Access to SentinelOne in System Preferences", "Authorize SentinelOne components in System Preferences". Approve Full Disk Access for SentinelOne Apps in the System Preferences.
Important: This is done only once on an endpoint. If already done on the endpoint, do not repeat it when the Agent is updated. If you do not complete this prerequisite step, the macOS Agent will not have full visibility to all files from all users.
Authorize Full Disk Access to these processes:
sentineld
sentineld_helper
sentineld_shell
Approve/Authorize Full Disk Access on a local computer :
- Go to System Preferences -> Security & Privacy -> Privacy Unlock it for editing and locate the “Full Disk Access” category
- Click on the “+” button under the existing list and it will bring up a Window
- Hit Command+Shift+G to get a prompt to enter a folder location
- Type in /Library/Sentinel/sentinel-agent.bundle/Contents/MacOS/
- You will see multiple files in this folder – you have to add and enable “Full Disk Access” for below process
sentineld_shell
sentineld_helper
sentineld
- Make sure the checkbox is selected for these items under “Full Disk Access”
- Once done, make sure to lock the config in Security and Privacy and close the System Preferences Window
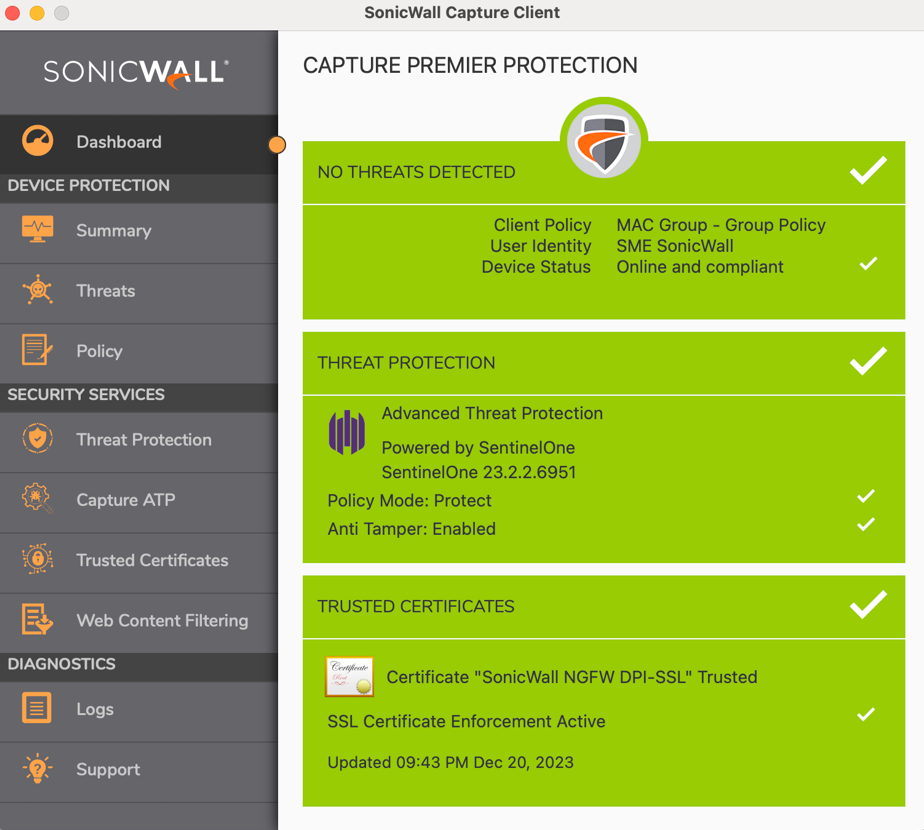
Check your Client UI to make sure it "Threat Protection" is enabled and screen looks like below

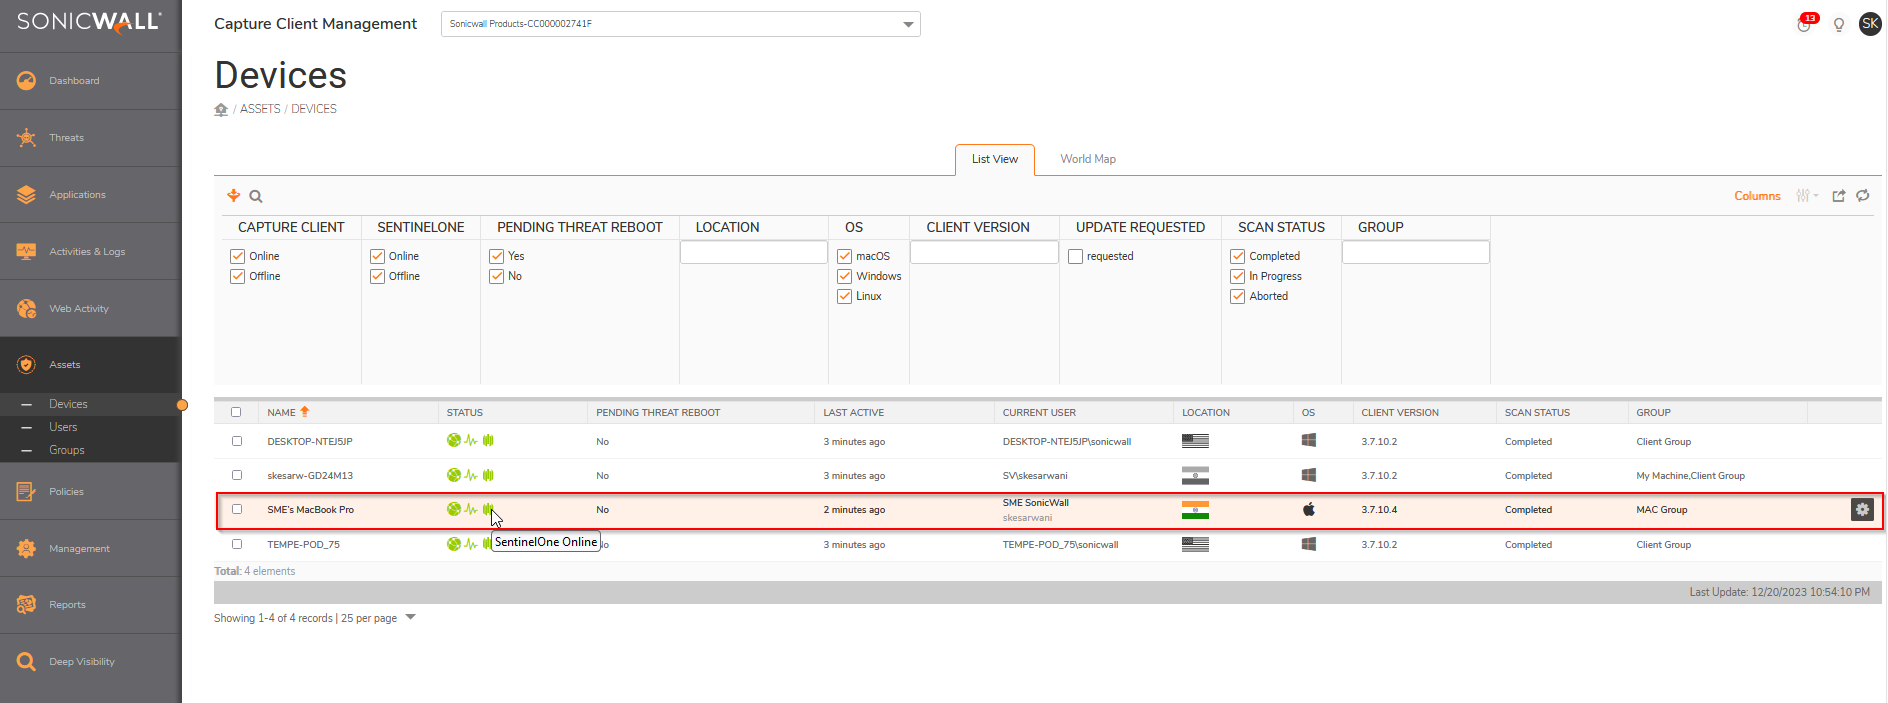
Check the Capture Client Management Console and you could see Sentinelone Icon showing Online

Related Articles
How to Check and Install Windows Updates for Windows 10 and 11 to Boost Performance
Regularly updating your Windows 10 or Windows 11 computer can significantly enhance its processing performance. Here's how: Note: This guide is designed for users who have access to a front counter Windows Surface Pro or a front counter/office Dell ...Printer Queue Errors on Windows 10 and 11
Basic Troubleshooting: Printer Queue Errors on Windows 10 and 11 This general guide will walk you through step-by-step instructions to clear the print queue, enabling you to overcome common printing problems effortlessly. By following the ...Maximizing battery life for Surface Pro tablet
This article provides tips to maximize and preserve your battery's life in your Surface Pro tablet The capacity of lithium-ion cells will diminish after a certain number of charge/discharge cycles. This will result in shorter intervals between ...